Showing posts with label Crafts. Show all posts

Friday, July 20, 2012

Woven Wine/Beer Journal

It's been a while. I've been a slacker. I did want to share a project I did (which I think will soon be replaced by an awesome App I found unfortunately). So let me say this...1) If you want to cover a regular sized composition notebook, you need to use prints larger than 8x10. The smaller composition book I used was really not adequate. This is by far not the best work I've ever done, but it's cute.

Where I got the Idea: Ruby Murrays Musings

Time: 2 hours

Shopping List:
Small Composition Notebook
Double-sided Tape
Clear Scotch Tape
5 or 6 pages from a Beer & Wine magazine
Something heavy to hold down the magazines with
Scissors
Instructions:
1. Prep - To begin, you'll need to cut the pages of the magazine into strips. If you were smart (unlike me), you'd actually measure. I was doing this to reduce stress, so I just cut. As you can see, my lines are not uh even.


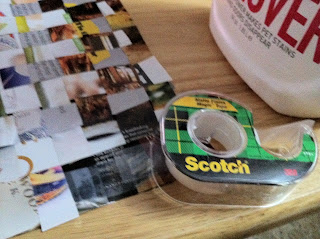
2. Tape - You'll need to cover the front of the composition book with double-sided tape.     


3. Weave - Layout all of the horizontal pieces, I used two(ish) magazine pages. One of a bottle of wine and one of a bottle of Whiskey. I inter-spliced this (one part of the wine bottle, then a strip from the whiskey bottle, then part of the wine bottle, etc.), because I thought it would look kinda cool. In retrospect, I think I suggest doing one then the other.


4. Weave - So then you take one of the remaining strips and weave it through the horizontal row. It's helpful to put something heavy on the corner to weight down while you are weaving. 


5. Assembly - I put my woven picture on top of the book and flattened starting at the binding. I then cut the edges to match the edge of the composition book.
 6. Tape - I think the original person used contact paper, which I'm sure looks nicer. I just had scotch tape, so I taped the cover down for protection.
7. Wine/Beer - So I used one side of the book for wine and one for beer. The wine has been just Robert Mondavi, which hasn't been bad! The beer we've had all kinds of varieties of Clown Shoes, Terrapin, more Terrapin, Lagunitis, and more. 

While I like my journal, we then found an awesome app for the ipad called My Beer Nation. It's pretty awesome....we've been using that. I plan on trying to make the woven atlas journal for my grandparents for their travel to Egypt. I think it'd look pretty cool! :)

Tuesday, May 29, 2012

Repurposed Craft Room

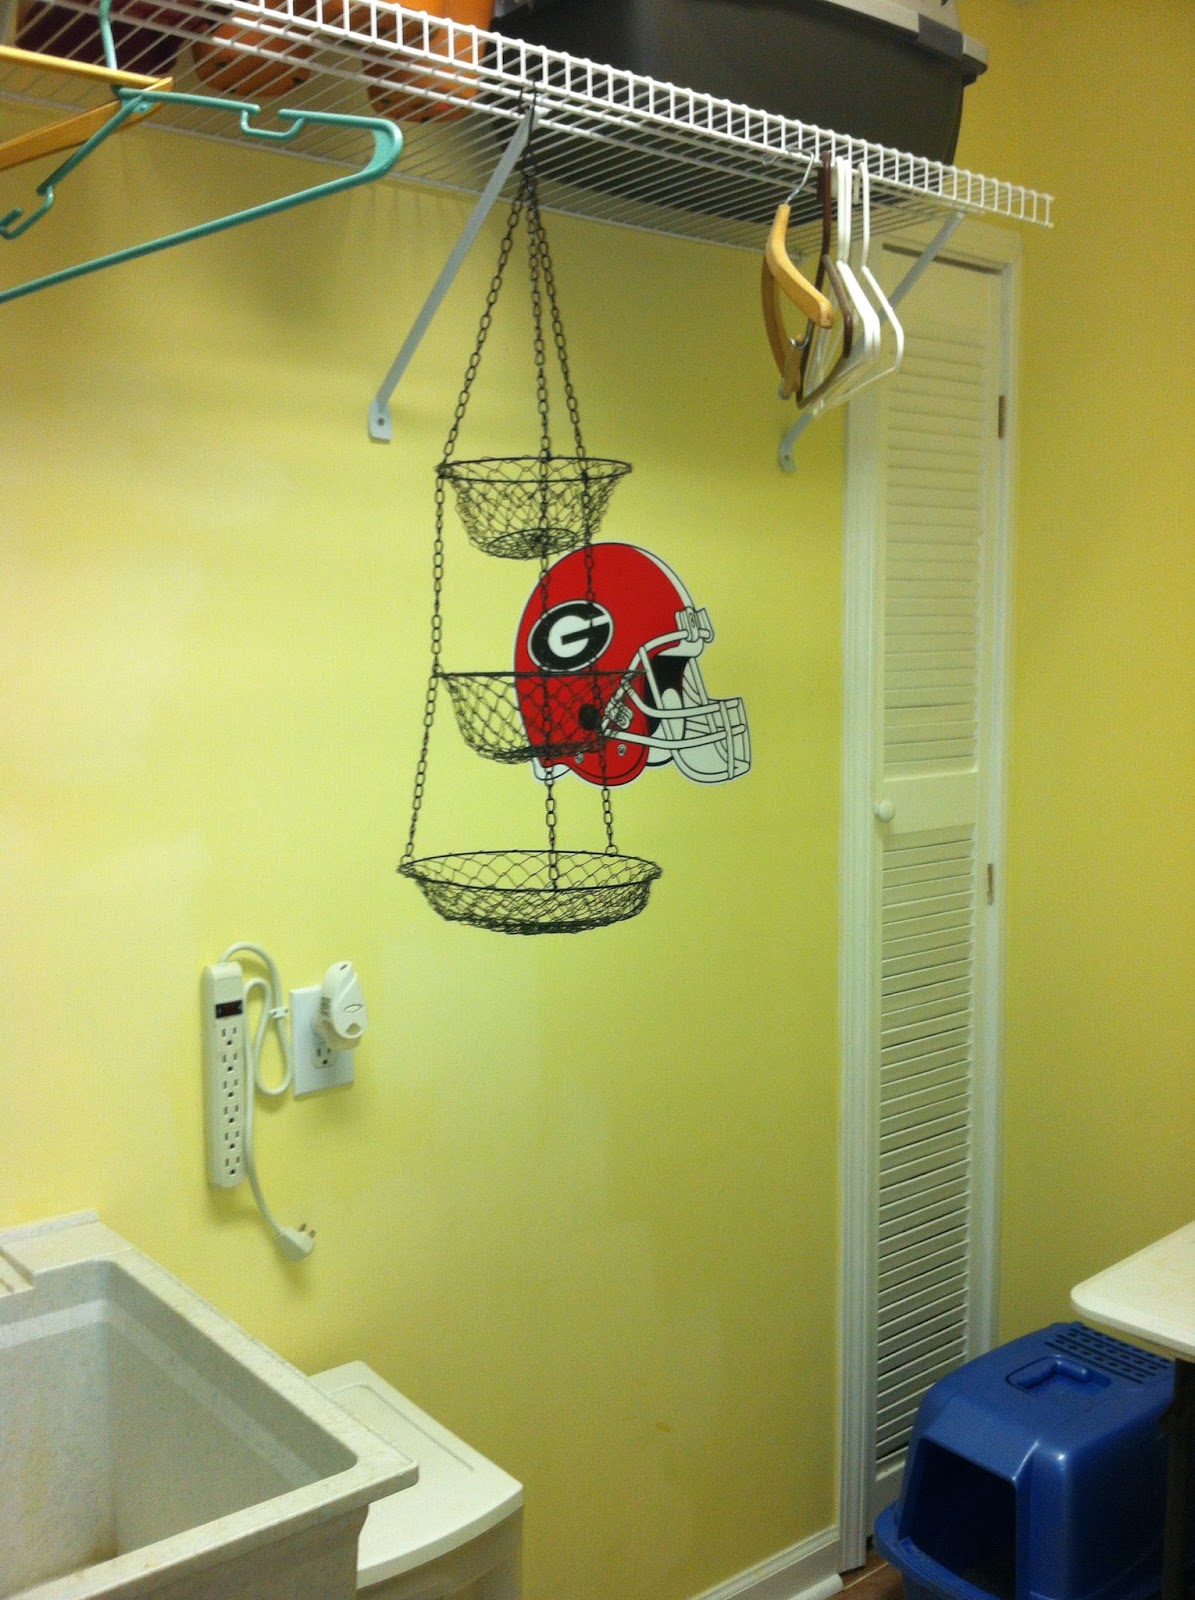
As my supplies are growing, I realized I need a room. We have a perfectly good room that's only purpose was to house the cat liter box & cat food. So that needed to change. I pulled out our tailgating table (which will be moved on days we go to UGA games), rearranged a few shelves, added our UGA Wall decals, and boom! I have a nifty little craft room. To the left is the before (the liter box was over in the corner).


I did use Tilex Bleach on the floors, because they were nasty. It needed to be done weeks ago. Between the bleach, stain & polyurethane WOW our house smelled interesting! The cat already found it to be interesting :). I consolidating my sheet music into one container and had a whole extra set of shelves (the blue thing) for an extra set of drawers. I quite like it. Plus the dogs can't come in (or they stare at the cat food and slowly creep toward it to eat it. Instead they just look through the cat door we installed through the door.

Adding a bit of color

We had the green planters in our bathroom since before we moved into the house (the people before us put them in). They've always been nice, but kind of plain. Since Joann's had all of their flowers 50% off, I decided some mini-yellow daffodils would help give some color to the bathroom. I'm not in love with it, but I think they look good!

Map Heart Frame

I saw this idea and thought it was the cutest thing. My in-laws anniversary is on the 30th and they were hauling off our carpet for us, so I thought this would be cute for them!
Where I got the Idea: Queen B - Creative Me
Time:
90 minutes
Supplies:
6 sheets of card stock (5 are off white and 1 is yellow for the accent)
Sewing pins
Heart stencil
Pencil
Scissors
Masking Tape
Long Frame
Pen & someone with nice hand writing
Instructions:
This was a Friday afternoon decision to do this project, so on my way home from work I went to Marshall's to find a frame. This one was $13, had I spent some time looking for other frames I probably could have found one for less. 

1. Prep: I found the address to the 5 places that were meaningful to my in-laws: where they met, where they were married, where they lived for 15 years, where they loved traveling, and the house they love now. I found the address on mapquest and printed them on the card stock. I tried to be clever, save paper, and use one side for each...with mapquest's headers & footers that didn't actually work.
2. Cut Stencils: I went to look for a heart punch at Joanns. First, they were all smaller than I wanted. Second...wow! $18!??! Seriously!? So I grabbed a stencil set that was $5 (still hated spending $5 for it). I traced the stencil with a pen (because I'm lazy and there wasn't a pencil in my immediate vicinity).  I did this for all of the locations. You MAY want to get an extra few sheets of card stock. One of the locations was zoomed out a little bit too far, I wish I had zoomed in, but I just had enough card stock (and wasn't making yet ANOTHER trip to the store).
Note: I had initially hoped to paint the back of the frame yellow, but since it was a long frame, I wanted to use the back of the insert (you know the one with the fake pictures on it). There was still too much white on the frame, so Alex said cut a heart out behind it...so we did!
3. Yellow Hearts - I cut a plethora of yellow hearts (okay maybe not a plethora, but as many as I could squeeze out of the 8x11 sheet of card stock I had left). I thought about doing a patterned design, but this is the one that looked the best. I just rolled a piece of masking tape to hold them in place. It gave the hearts a little bit of dimension...or as much as you can in a frame.

4. Pins - I was worried that the pins were going to be too thick. I used all red sewing pins and put a pin where the actual location was. Because the pins obviously stuck through the back of the board, I just folded them over and taped the back. 
5.  Labels - Alex has really ridiculously nice handwriting. It's actually the only reason I married him (kidding). So I made him write the we met. we married. we lived. we traveled. we loved. This was his "fun" handwriting.

Ultimately, I thought they turned out great. My in-laws were touched. It was a quick project. I am looking forward to having enough history with Alex to make one of my own. All though we could
 do just a UGA one....we met. we cheered. we lived. we loved. we lost?...

Tuesday, May 22, 2012

Penny Years

For whatever reason I got this idea in my head to do something with pennies for my little brother's birthday. I think you can come up with plenty to do with pennies. This was my idea!

Where I got the idea: Myself

Time: A few days to find the pennies, but the actual project took 45 minutes

Shopping List:
Penny from every year
Krazy Glue
Flat Frame
Colored Paper
Black Fine Point Sharpie

Instructions:
1. Prep: Finding a penny for every year was pretty easy. Then again he was born in 1989. I actually think if you had a few weeks you could do this for numerous ages. I thought about doing one for special occasions - years our parents born, year he was born, year people met, year graduated college...I think you can end up doing a lot of creative things with it.  

2. Glue: Arrange the pennies in chronological order around the frame. This is important, because Krazy Glue dries those suckers on there fast & tight. I messed up the corner of the frame. I didn't have enough pennies to cover the entire frame (I used 5x7). Fortunately, I spaced them out and said there was room for two more for his 24th & 25th birthdays! :) Go Me!

3. Frame: I thought it was clever to use the phrase: "Find a penny, pick it up, all day long you'll have good luck!" I changed the day to year (since I used a penny for each year...). I thought printing it would be a little too impersonal, so I tried freehand calligraphy  my best pretty cursive (which isn't THAT great...). I practiced about 4 times before getting my spacing just right..and it still looks just "eh".

All in all, I think he really liked it. He thought it was nice, and then realized it was a penny from each year he's been alive. I got him two other things as well, but I thought this was nice & sentimental and didn't cost really anything to do!

Painted Hand Rail

After Alex painted the stair rails, we decided to paint the hand rail as well. I had a while to wait for the exterminator yesterday (routine checkup, no need to worry!). I decided to paint the hand rail! 
 
Where I got the idea: Myself?

Time Project Took:
90 Minutes

Shopping List:

Black Acrylic Paint
Cheap Foam Brush
Plastic Cup (to put the paint in)
Construction Paper & Painters Tape
 
Instructions:
1. PrepI had extra construction paper, so I used that as my wall painters cloth. I thought I'd be able to slide the paper behind the bottom of the rails...I didn't have quite as much luck with that as I originally thought. But this worked quite well, and there was only a little bit of paint on the wall. 
Speaking of paint, I used acrylic, because that's what I had. The rail turned out fine, even though I maybe should have used wood. The paint is like $3 at Wal-mart. I used a plastic cup to put the paint in. With three coats, I used 1/2 a bottle. 

 This worked out just fine. The foam brush I used was a cheap back that came in a set of like 4 for $1. As I said, it worked just fine for all of this.

2. First Coating: I was worried with the first coat, because I didn't want to use too much paint, but it was a really thin layer. I painted underneath the rail and a little bit over the fixtures. The person before me had done the same, so I wasn't too overly concerned. This took no time at all to dry. Because I spent so much time getting every edge, I immediately went to paint coat two, which I applied a little more liberally.


3. Second & Third Coating: The next two coats went my much quicker (as I didn't spend a lot of time underneath the railing...its mostly black no one looks underneath your rail, so why spend a lot of time making sure it's super black!). I liked using acrylic, because when you do have spots like in the picture, a wet paper towel will clean that right up!


I let the second coat dry for for 10-15 minutes. The dog's tails had a little bit of black on them...they can't keep out of anything.

All in all it dried with a really nice finish. The third coat was mostly touch ups. All in all I'm really happy with it, and it makes the stairs pop next with Alex's other painting. We're going to do the basement rails too, but Tuscan Red to match the accents. 

Second Coffee Filter Wreath

I promised my mother in law that I would make her a wreath at the same time as my mother's. My mother in law's took a wee bit longer, and I was finally finished tonight. Rather than the earth tone colors my mother wanted, my MIL wanted greens, as that would match more things. That was actually easier to paint. So to show some of the pictures of the in between of actually making the flowers, I decided to take pictures!

I think I like the multi-colored one better. I don't like the all-green one quite as much. Then again, it isn't going on my door! 

So here's how to actually make these time-consuming flowers (that can be crushed so quickly if your car battery dies in the Kroger parking lot and the dog starts freaking out and jumps into the back trunk area (is it called a trunk in a Highlander?)....not that that happened). 


After you dye/paint all of the coffee filters (and let them dry), you'll want to fold all of your flowers. This lets you keep them organized if you do the project over multiple days (which is highly recommended, unless you've solved for the space-time continuum). Take 3 to 4 (I used 3 for all of these flowers) filters and put them on top of each other. Fold the filters in half twice so you get a cone.

As a side note, this reminded me of making snow flake chains in school. So then cut out the bottom out of the coffee filter. You can kind of see what I did in this picture. You're going to twist the centers, kind of like a figure eight. This took me a little bit of time to figure out, once you do, it's easy. Take each center and put on the end of a piece of masking tape. I found it's better to have too much masking tape then too little!

Then it's time for the ruffles. The cut remaining part of the coffee filters (just one quick snip). Then make overlapping ruffles along the masking tape, like so. I can't decide if I liked small ruffles or larger ones. I think you can do more (and if you are running out of coffee filters) with the large ruffles, but small ones are good for diversity!

Once you are done with the first filter, just pick up with the second and keep going until you've used all 3 filters to make a line of ruffles. Now it's time to roll the flowers. You'll want to start with the centers side and start rolling the flower. You can shape it however you want, depending on how tight or loose you want the flower. I found that rolling it tighter in the center makes prettier flowers. Plus if you used large ruffles, you can make the tape tighter but the flowers fuller.

Keep going and if you have extra tape on the end, either wrap it around the flower or cut it. You'll end up with a nice pretty carnationy looking flower!

While I was gluing the flowers onto the wreath, I found sometimes having the end of the flower to slide under other flowers helpful. Other times, I cut the bottom off and glued it flat. I think this gives a nice variety of flowers either facing straight up or to the side.  It's your wreath, do as you please. Although after making two...I highly doubt I'll do another one.

Side Note: HOLY CRAP Don't burn yourself with a hot glue gun. It hurts...like major hurt. I held an ice cube on my finger for over an hour and still burned. It blistered almost immediately.

I think it turned out nicely. I was a little annoyed it got smushed in the back seat, but such is life. I'm just glad to be done with the project!

Monday, May 14, 2012

Toilet Paper Roll Art

I wanted to do this from the moment I saw it. Alex was a bit anxious about it, and I think he still is. Ultimately I think it came out pretty cool. I saw two designs for this - one that was a spiral and one that was a flowerly flowy one. I went with the latter.


Where I got the idea from: Cut Out and Keep

Time: 2 hours

Shopping List:
Krazy Glue
Bobby Pins
Clothes Pins
Lots of Toilet Paper Rolls, Paper Towel Rolls
Spray Paint (I used Georgia Clay)
Nails (and a hammer)


I used 8 or so Toilet Paper Rolls, 4 Paper Towel Rolls, and a used wrapping paper roll. The problem with the wrapping paper roll is that the flowers were smaller than the others. So if you are using this, I would make sure it is a larger roll (like Christmas paper). I ended up using the wrapping paper roll for smaller flowers & the leaves.

I started using rubber cement then switched to Krazy Glue. Use Krazy Glue...it dries much much faster!

My Final Note: I started using clothes pins. I didn't get the tight flowers I wanted, because clothes pins are thick. The Cut Out & Keep website suggested bobby pins. So I grabbed a pack of bobby pins and used them. They were much better, and enabled me to keep most of the flowers aligned. When I was gluing pedals together (rather than the individual flowers), I used clothes pins, because they were easier to grip & pull off. 

Instructions
1. Prep: To start, cut all of the rolls into thin strips. Maybe 1/2 an inch? This all depends on how thick you want it. They don't all have to be the same size (although you want them close). To cut them into strips, you can flatten the toilet paper roll (this gives the flowery look). Plus I'm not sure how you'd cut them easily if you didn't!

2. Making the Flowers: What you'll want to do is make several flowers (if you end up going with the spiral, only do one flower and then glue pieces spiraling out). To make a flower, take five toilet paper strips. Put a little bit of Krazy Glue near the edge of one roll and hold together another roll like so. Put a bobby pin on them to hold them in place. Continue on with the remaining petals.

3. Glue together: Glue together the flowers in a winding pattern. I used the smaller pedals as leaves pushing out. It's really up to you.

4. Spray Paint Once you are finished, Put your creation on a drop cloth & spray paint. You'll want to move around in a circle to be sure you get all edges. I did one thick coat which took about 30 minutes to dry (it was about to rain so I didn't have the benefit of that wonderful Georgia sunlight).

5. Hang: I suggest putting in two nails first then hanging your art. This will help ease the strain on the artwork as you are hanging it (it is after all painted cardboard paper...). You can manipulate it to give the curve/whatever you would like.

For being a really inexpensive project, I think it's definitely a high impact! Now back to that old wreath for my mother-in-law that I have to finish...


Monday, April 30, 2012

UGA Organizational Board Revisted

Okay so here are some additional things I want to mention about the Org. Board!

1. You may want to consider stronger adhesive for the paper mache box. Ours falls down, so Alex just used some super glue and glued that sucker onto the box.
2. Because certain members of my family needed this pointed out, you are using glass picture frames so they become dry erase! :) If you didn't see it before...EXPO is the way to go!

3. Leave enough space between the date of chores & the first chore. That way you can write the month name in there and the seasonal group. The daily is easy to erase every day. I haven't decided if I'm going to write the week on there yet. However, this will keep you from cheating & checking off things that you didn't actually do!

4. I think in order for this not to become wall art, you need to customize it. You need to write down things you are actually going to do. I have mop floors & vacuum once a day...yeah...that hasn't happened. The entire list isn't filled of these things, which would mean I'd ignore the list. However, having one or two that I constantly have to stare at as not marked off, is great. I actually do think about vacuuming every day. I'm about two weeks off from actually starting it. The other thing is the Menu..I'm not a dinner planner for the week. However, I am trying to force myself to do it. We'll see...


Monday, April 23, 2012

Coffee-Filter Wreaths

I'm still working on these, but will never ever do this again. Wow did this take much longer than I thought! 'm not sure I'd recommend this again. Granted, I was trying to make two wreaths at once (one for my mother & one for my mother-in-law). This is why they aren't red and black...I asked what colors they would like so they would match their houses.

Who I got the idea from: Lovely Crafty Home 

Time: Multiple Days 

Shopping List: 
2 packages of Coffee Filters (if you have extra...well it only costs $2 per pack of like 200...)
Acrylic Paint
Paint Brush
Cups
Cardboard Wreath Print Out
Ribbon
Scissors
Hot Glue

Instructions:

1. Prep: Be sure to prep your area. You'll want to hang clothes lines with clothes pins around the house. Please be sure to tell people you are doing so if you choose to use a chandelier & a door as part of your line. Put down painters cloth on the table  and underneath the pin area.

2. Paint: So for the colors here...I blended as I went so I'll show you the steps. The less paint, the quicker it drys. It only takes one or two to realize you should have let them dry longer. Semi-wet coffee filters don't stick to tape very well. 
  • Cup A - Coffee: I used strong coffee for the first set of colors. They gave the cream colored flowers. I had 50 clothes pin, so I did 50 of these. 
  • Cup A - Pink: I poured some more coffee into a cup and pink paint. The water cuts the paint so it doesn't take as long to dry (and makes the paint go further!). When you're done...don't dumb this cup out. I had 50 clothes pin, so I did 50 of these.
  • Cup B - Yellow:  I poured water & yellow paint for the yellow flowers.  I had 50 clothes pin, so I did 50 of these. 
  • Cup A - Burgundy: I poured the Yellow from Cup B into the Cup A for the pink. I added some dark red paint and swirled until i got a color I liked.  I had 50 clothes pin, so I did 50 of these. 
  • Cup C - Green: I poured a little bit of green paint, lots of water, and green food coloring in to get a pale green.  I had 50 clothes pin, so I did 50 of these. 
  • Cup C - Darker Green: I poured a darker green into the cup (and added more water if needed) and some more green food coloring to get a darker green. Can you guess how many I did?
  • Cup C - Dark Green: For this one I poured more green paint, green food coloring & blue food coloring into the mix. This gave me a rich dark green.
3. Make the Flowers: How I make the flowers, I'll defer to lovelycraftyhome.com. This takes about 6 minutes per flower. I suggest making one of each color as you go. That way you can start hot gluing the flowers in. This will make you a lot less depressed, since this takes so amazingly long.


4. Ribbon: I cut a hole in the middle of the cardboard wreath. I put both sides of the ribbon into the slot and wrapped it around through the large center part of the wreath. I tapped & glued the ribbon in place. If you do it this way, it's important you do this before you begin gluing the flowers!

5. Hot Glue: Glue the flowers onto the wreath. I tried to stagger the pattern a bit. In retrospect, I could have used another color, but I'm getting anxious just thinking about it. I originally cut off about half of the "masking tape stem" so I could stand them up. After the first 5 or 6, I stopped and just glued the bottom. As you're gluing you'll find you smush the flowers a bit. It's okay, just well unsmush them and be careful. 


*****UPDATE: So as you can see I finished the first wreath. I feel as though I could be lulled into a sense of "oh you can do it again." To break down the hours:

Set up: 20 minutes (includes stringing lines for the filters to dry & cutting wreath out of cardboard)
Painting Filters: 2.5 hours (I did four colors so 30 minutes x 4 plus any in between time)
Each Flower: 3.5 hours (6 minutes to make & there were probably 36 flours on the wreath)
Gluing onto the Wreath: 15 minutes
Total Time: approximately 6.5-7 hours

The biggest task is painting the filters. Beacuse I did enough coffee filters for two wreaths it took most of my day on Sunday. Doing a few flowers a night while watching TV wasn't bad at all. 

A Few Final Notes:
  • I varied between wanting little flowers & big flowers. Ultimately be generous with your masking tape so you can make large ruffles for large pedals. This will take up space on your wreath and they don't look bad.
  • I realized I didn't have cardboard after I started, so I found an old Christmas Garment  box and cut it from there. This gave me two wreaths and worked pretty well. I mean we collect the "gently used" boxes every year and they seem to just collect in a pile so why not!
  • If you were slightly impatient like me and didn't wait for the filters to dry, if you leave them overnight, they dry!
  • I also folded all of the flowers into 4 for easy storage. I didn't trust either of the dogs or cats to leave alone a pile of coffee filters. 
  • Last, I'll post the green one once I'm finished. I have about 4 hours to go on that one.