Showing posts with label Easy. Show all posts

Friday, July 20, 2012

Index Card Calendar

I can't remember if I saw this on Pinterest or actually on the block Peck Life, but I thought it was cute. I am under the assumption that I'll forgot about this in two months. However, I've been diligent so far! Ignore my index cards with holder box right now...the box I got was too small...

Where I got the Idea From: Peck Life

Time: 2 hours

Shopping List:
400 Index Cards (I'd say 377, but well you buy them in packs of 100)
Black Fine Point Pen
Index Card Box

Instructions:
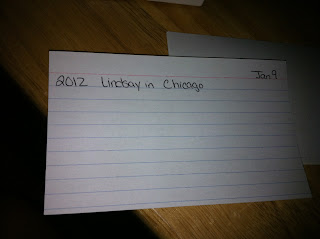
1. Prep: So this project is really really easy, it's just tedious. So on the top of each lined card on the right hand side you'll want to put the date: Jan or January (I would stick with abreviations) then the day. You'll need 1 card for every day of the year (don't forget February 29th). 
2. Months: You need dividers for the months. I cut pieces of another index card out and taped it to the month for dividers. Peck Life, was much craftier than mine!
3. Years: So you'll use one line for each year. I keep a really good calendar at work, so I was able to go back 6 months and put what we did. Although a lot of days said "work". But it allowed us to not have to wait until January 2013 to start the project!

 4. Box: So don't get the small size Index Card box that's $1.88...get the $2.88 one. The smaller one doesn't fit...oops.
5. Keep up with it: I think this is the hardest part. But the sooner you do it, the more you're able to put about yoru day. I can't wait to get two-three years down the road and see how this forms. 

Alternatives: For holidays/birthdays that are on actual dates rather than floating holidays, I put the name of the holiday at the top of the card.

Woven Wine/Beer Journal

It's been a while. I've been a slacker. I did want to share a project I did (which I think will soon be replaced by an awesome App I found unfortunately). So let me say this...1) If you want to cover a regular sized composition notebook, you need to use prints larger than 8x10. The smaller composition book I used was really not adequate. This is by far not the best work I've ever done, but it's cute.

Where I got the Idea: Ruby Murrays Musings

Time: 2 hours

Shopping List:
Small Composition Notebook
Double-sided Tape
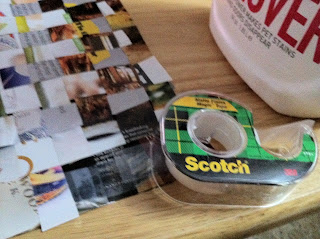
Clear Scotch Tape
5 or 6 pages from a Beer & Wine magazine
Something heavy to hold down the magazines with
Scissors
Instructions:
1. Prep - To begin, you'll need to cut the pages of the magazine into strips. If you were smart (unlike me), you'd actually measure. I was doing this to reduce stress, so I just cut. As you can see, my lines are not uh even.


2. Tape - You'll need to cover the front of the composition book with double-sided tape.     


3. Weave - Layout all of the horizontal pieces, I used two(ish) magazine pages. One of a bottle of wine and one of a bottle of Whiskey. I inter-spliced this (one part of the wine bottle, then a strip from the whiskey bottle, then part of the wine bottle, etc.), because I thought it would look kinda cool. In retrospect, I think I suggest doing one then the other.


4. Weave - So then you take one of the remaining strips and weave it through the horizontal row. It's helpful to put something heavy on the corner to weight down while you are weaving. 


5. Assembly - I put my woven picture on top of the book and flattened starting at the binding. I then cut the edges to match the edge of the composition book.
 6. Tape - I think the original person used contact paper, which I'm sure looks nicer. I just had scotch tape, so I taped the cover down for protection.
7. Wine/Beer - So I used one side of the book for wine and one for beer. The wine has been just Robert Mondavi, which hasn't been bad! The beer we've had all kinds of varieties of Clown Shoes, Terrapin, more Terrapin, Lagunitis, and more. 

While I like my journal, we then found an awesome app for the ipad called My Beer Nation. It's pretty awesome....we've been using that. I plan on trying to make the woven atlas journal for my grandparents for their travel to Egypt. I think it'd look pretty cool! :)

Tuesday, May 29, 2012

Beer Bottle Cap Tray

We've been collecting beer bottle caps for about 4 years now. We had a bucket and just tossed them in when we grabbed a beer. We've been trying to figure out a way to use them, and I stumbled upon this blog from Inspirations & Decorations. I had two different designs, and this was my first attempt with Modge Podge & Resin. I did one tray with both. After several hours - Modge Podge is the way to go. It's cheaper, dries clear, and is much easier to put on.

Where I got the Idea: Inspirations & Decorations

Time: 4 hours (plus overnight to dry)

Shopping List:
2 Trays
A whole lot of beer caps
1 Bottle of Ice Resin
1 Bottle of Modge Podge
Cheap Foam Brush
Black Spray Paint

Instructions:

1. Prep
I decided to start finding all of the Sweetwater & Terrapin caps first to make a Georgia tray. I've learned we drink a lot of Sweetwater & Terrapin caps bend way to easily. I was hoping to do a cool design, but because most of the Terrapin caps were too bent, I stuck with a Terrapin boarder.

I started putting them on the tray to figure out how many I needed. I did the same thing with all of the other craft beers. It's fun to see how our tastes have changed between the "Old Faithful" - Sweetwater; "Cheap" - Bud Lime or Miller Lite; or "Trying something new" - Red Hook IPA. We also drank a lot of Stone IPA, which has a lot of cool caps.

2. Paint - We painted both of the trays black and let them dry. Seeing how amazingly hot it was this weekend, this took no time at all!

3. Arrange  - So now is time to put all of those bottle caps back on the tray. There is clearly a better way to do this, rather than doing it twice (i.e. wait until AFTER you paint it to do this), but I didn't want to do that for whatever reason. Anxious maybe? So here are the two different trays.


4A. Glue Part One 
 Okay so we had  bought Ice Resin, at Hobby Lobby. I'm not convinced this is the greatest thing ever. I also bought a bottle of Modge Podge. I decided to use the Modge Podge on the Hodge Podge of caps! Okay so the Modge Podge, I poured out over the tray and pushed it around with the foam brush. I was a little nervous about the white, because well I had never used Modge Podge before! Turns out...it does eventually dry clear. This morning we had about 1/2 of the glue had dried up. I'm very pleased with this attempt!

 4B. Glue Part Two
So we decided to use the Ice Resin on the Sweetwater/Terrapin trey. That one didn't turn out quite as good...meaning it didn't work. So I guess we need some more Modge Podge. I may change the design too...I'm not loving it.


****UPDATE: The Modge Podge eventually dried (I do think I used wayyyyy too much, but for my first experience with it, it was a breeze!). The Ice Resin never really worked. I rearranged the design making stripes (two diagonal rows of Sweetwater followed by a row of Terrapin). Next time I go to the store, I'm getting more Modge Podge to finish the tray. All in all easy peasy!

Repurposed Craft Room

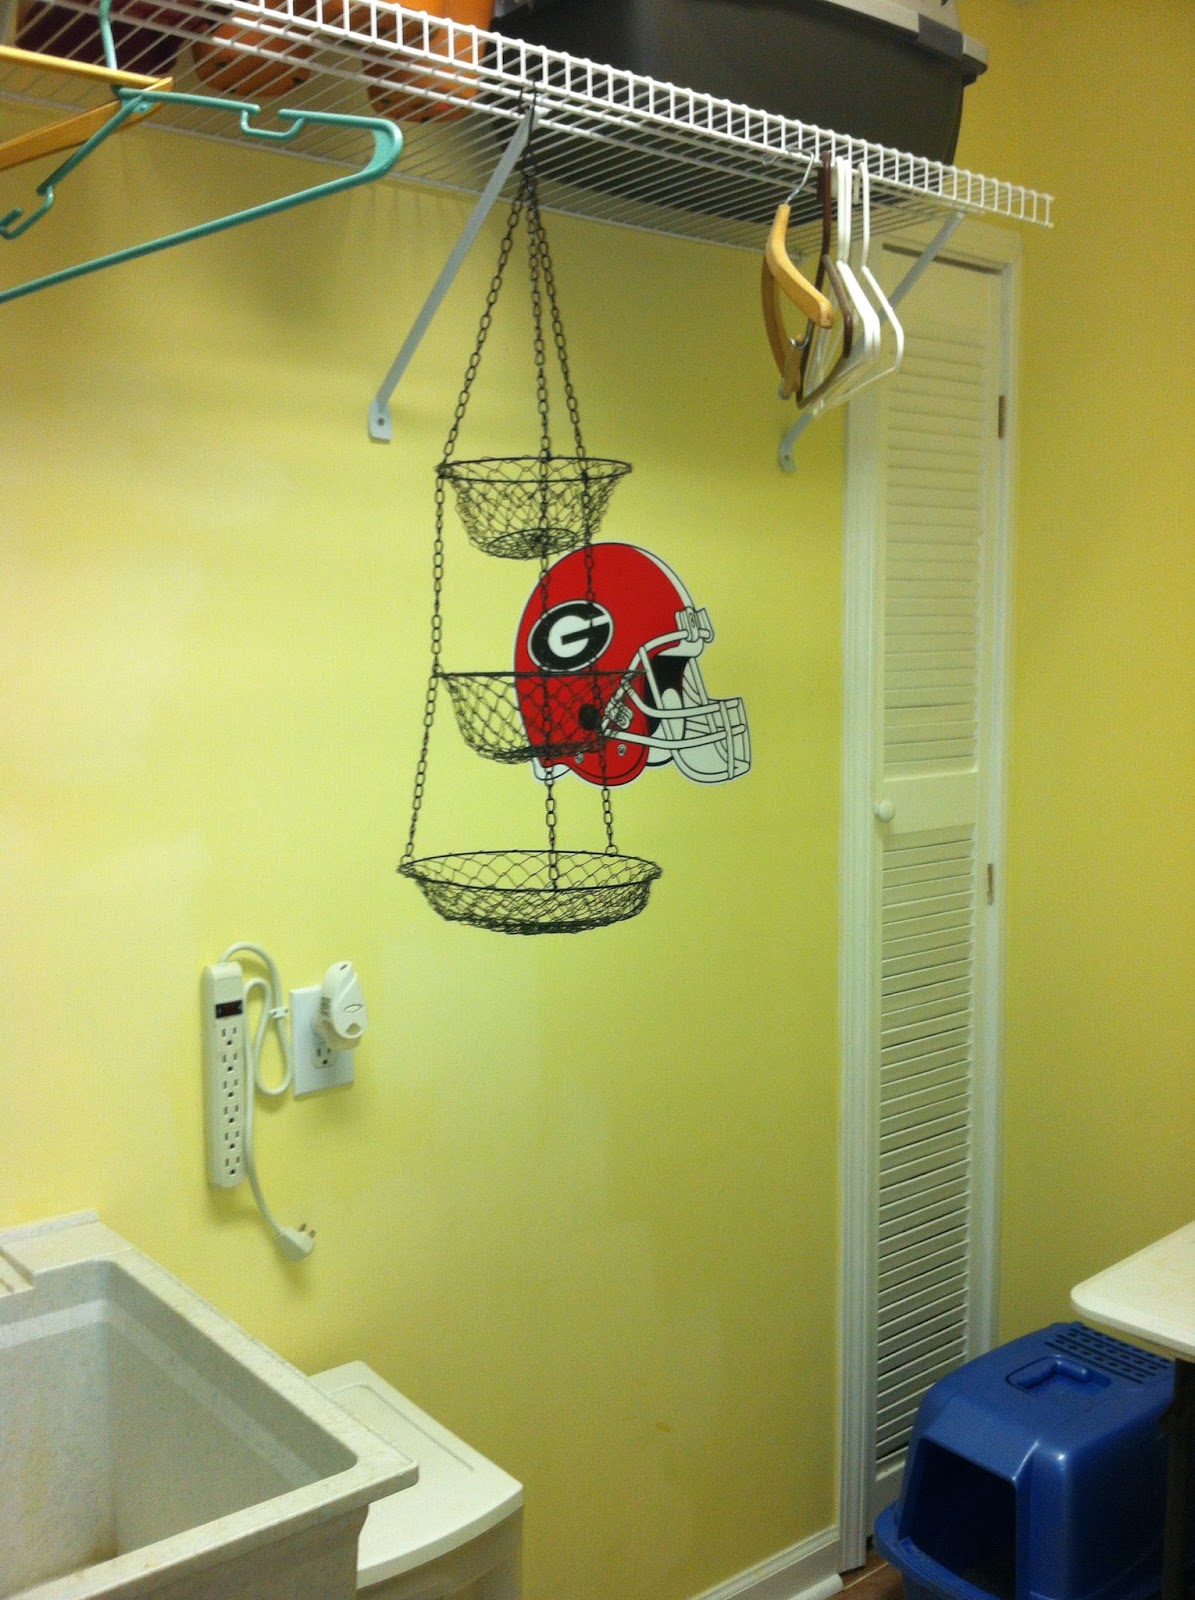
As my supplies are growing, I realized I need a room. We have a perfectly good room that's only purpose was to house the cat liter box & cat food. So that needed to change. I pulled out our tailgating table (which will be moved on days we go to UGA games), rearranged a few shelves, added our UGA Wall decals, and boom! I have a nifty little craft room. To the left is the before (the liter box was over in the corner).


I did use Tilex Bleach on the floors, because they were nasty. It needed to be done weeks ago. Between the bleach, stain & polyurethane WOW our house smelled interesting! The cat already found it to be interesting :). I consolidating my sheet music into one container and had a whole extra set of shelves (the blue thing) for an extra set of drawers. I quite like it. Plus the dogs can't come in (or they stare at the cat food and slowly creep toward it to eat it. Instead they just look through the cat door we installed through the door.

Custom Art Work

I think these will look great in the master bedroom (once I can actually get back in them again). These were super easy, and I think illustrate the plateau of my creative artsyness.

Where I got the Idea: Ready Made


Time: 2 hours

Shopping List:
Three tubes of paint
Three canvases
Masking Tape
Foam Brush


Instructions

1. Prep - To prep, I laid down a painters cloth outside (again utilizing that wonderful Georgia sun). This weekend had 50% off canvases PLUS an extra 10% off everything. So I got three canvases! I painted all three canvases an egg-shell white color (the same color we're going to painting the floor boards in the bedroom). I'm 99% sure you could keep them white, I just didn't. Then let it dry.


2. Tape - This was fine and a bit nerve wracking. I decided to make tape lines point toward the middle canvas then down the center of the middle canvas (if that makes sense). I ended up doing great lines (without realizing it), if I do say so myself.

3. Paint Again - So now paint again. I used the red that we're using elsewhere in the room. The green looked a little too Christmasy, so I painted over it in a dark green (almost black). I think that color was a bit too dark. Of note: If you have a dog that likes to help...they may end up with paint on their side. Fortunately, it wipes off easily. I would imagine if you've read any of my other posts, you can guess which one was the problem child....

 4. Remove Paint - Make sure you wait plenty of time for it to dry (hot Georgia sun helps). Then take off the masking tape. This was kind of fun. :) Voila! Ignore Gus's tail and Lucy's head...

UPDATE: I still cant wait to put this in the bedroom. I'm so happy with the lines. I didn't even plan it, which was even cooler. The green is a perfect dark green which should really pop against the light green walls and the red will match the newly painted furniture!

Kitchen Conversion & Quick Reference Guide

I saw these the other day and absolutely loved them! I was too lazy to go to Kinkos, and Target wanted $12 for their 8x10 laminating kit, so I shrank them down and used a pack of 4x6 self-sealing laminating pouches.

Where I got the idea from: Another i should be mopping the floor project

Time Took: Less than 1 hour

Shopping List: 
Measuring Spoons
Command Strip hangers
Mounting Tape
4x6 printer paper
Packet of 4x6 self-sealing laminating pouches


Instructions
1. Prep - I made the tables in Excel, because I REALLY like Excel. Plus Excel 2010 has nice table formats. I used the red shades, duh. So I printed these out actually on photo paper. I ended up having a box of 4x6 photo paper prints, and I figured why not! 

2. Laminate - I was worried about the laminating process, but good god this was easy! This took no time at all. I trimmed the edges so they were uniform around the sides.


3. Hang - I'd like to say I hung the measuring spoons first, but if I did I would have moved it further down. Make sure you be careful of shelves. You don't want the door constantly open, because the tablespoon is hitting against your shelf. I hung the measuring spoon labels, then hung the measuring spoons. I then put the rest of the tutorials - the conversion chart, the title card (which Alex laughed at me for), and the quick reference (meat and a few other conversions - pints & quarts and all of those sorts of things).

Making 3 Curtains from One!

This was both a great idea and a disaster. So we have our curtains in our living room - red burlap material. I thought hey! Let's buy one curtain from Target. Cut it in half to use the top half for a curtain in the kitchen and make No-Sew Faux Roman Shades! Oops...

Part One: Kitchen
This part of the project was an afterthought. I bought the curtain panel to try to Roman Shades. When asked what I was going to do with the top part, I realized the bottom of the panels were already hemmed (so I could use those for the tops of the roman shades) and use the top of the curtain panel in the kitchen! It was a win win situation!

Where I got the idea: Myself & my mother

Time: Less than 1 hour

Shopping List:
Scissors
Heat-n-Bond - like this but in a roll..at Wally World it's under $2
Iron & Ironing Board
Measuring Tape
Curtain Rod (we used the existing ones in the kitchen)
One Curtain Panel (54x84")


Instructions

 1. Prep - Fold the curtain and cut! This wasn't done in half, I think I cut the bottom 1/3rd. The curtain I used had large stitching, so I was able to follow those lines. Thank god, because I'm horrible at these things, I've learned.

2. Hem - This was very easy! I measured down from the top to make sure everything was even and gave the curtain an even hem. After you pin the hem, put the Heat-n-Bond strips in and iron as directed. I was super excited about this one and how it turned out. Although, I do need to iron it again.

3. Hang - Then just hang the rods! I like how long they are (not done intentionally). It's very nice, because that side of the house gets the hot southern sun (because we're in Georgia and it faces South).


Part Two: Dining Room
Okay so this one WOULD HAVE turned out better if I was a little better at lines, straight lines, measuring, etc. It also would have been soooooooooooooooooooo much easier with a sewing machine. Need to ask for one of those for Christmas. Anyway, so I was going to do Faux Roman Shades. Unfortunately, my straight lines aren't great.
Where I got the idea: i should be mopping the floor

Time: 4 hours

Shopping List: 
Scissors
Heat-n-Bond - like this but in a roll..at Wally World it's under $2..you'll need 2-3 rolls
Iron & Ironing Board
Measuring Tape and a Yard Stick
Curtain Rods (we got these for cheap)
One Curtain Panel (54x84") - the left over from the first project!

Instructions

1. Prep  Okay so for these shades, if you actually measure them, I think they'll come out fine. I tried, but failed. So take the bottom section of the blinds and cut them in half. This should give you two identical pieces of fabric. Before you think about the folds, hem the edges. Make sure they are even on each side, because they will be hanging next two each other and thus identical. People will be able to see where you screwed up (hint).

The side that was already hemmed was an inch thick, so I stuck with that. Measure & pin all the way around. As you're pinning, slide the heat bond under the fabric edge. As you can see from the picture above, the corners will need extra. This was in a large part due to the thickness of the curtains.


2. Measure Folds  - My initial thought was to use tension rods to hold the curtains (I couldn't do as I Should be Moping did, because these were on doors).  Lightly fold over about where you want your folds to go. Mine were about every 7 inches apart with the folds being 2 inches wide. I used a yard stick to create a white line across the fabric. These actually came out relatively straight.

The bottom line is for the bottom fold and the top line is for the top fold (if that makes sense). Basically this makes the entire fold 2 inches wide. I think if I had JUST bonded the top of the fabric, it would have been fine. I was a bit overzealous with the heat-n-bond.


3. Iron - Because the material was so thick, I basically had to hold the iron on the fold for a good 20 seconds. This was a stark contrast to the hem I did on my pants which took 30 minutes total.  This took a lot of time for both curtains. If you already have a sewing machine, I strongly suggest using a sewing machine instead.


4. Hang - So our door is apparently steel. We broke two drill bits (and had a bit of an anger fit) trying to hang these things. We then had to rehang them twice, because they weren't measured. No names being mentioned. As you can see, they aren't perfectly even. I do feel as though I could try and make real Roman Curtains now. Especially now that I know where my mistakes went.

All in all had my lines been straight, under $35 for two faux roman curtains & a long curtain in the kitchen wasn't bad at all!

Map Heart Frame

I saw this idea and thought it was the cutest thing. My in-laws anniversary is on the 30th and they were hauling off our carpet for us, so I thought this would be cute for them!
Where I got the Idea: Queen B - Creative Me
Time:
90 minutes
Supplies:
6 sheets of card stock (5 are off white and 1 is yellow for the accent)
Sewing pins
Heart stencil
Pencil
Scissors
Masking Tape
Long Frame
Pen & someone with nice hand writing
Instructions:
This was a Friday afternoon decision to do this project, so on my way home from work I went to Marshall's to find a frame. This one was $13, had I spent some time looking for other frames I probably could have found one for less. 

1. Prep: I found the address to the 5 places that were meaningful to my in-laws: where they met, where they were married, where they lived for 15 years, where they loved traveling, and the house they love now. I found the address on mapquest and printed them on the card stock. I tried to be clever, save paper, and use one side for each...with mapquest's headers & footers that didn't actually work.
2. Cut Stencils: I went to look for a heart punch at Joanns. First, they were all smaller than I wanted. Second...wow! $18!??! Seriously!? So I grabbed a stencil set that was $5 (still hated spending $5 for it). I traced the stencil with a pen (because I'm lazy and there wasn't a pencil in my immediate vicinity).  I did this for all of the locations. You MAY want to get an extra few sheets of card stock. One of the locations was zoomed out a little bit too far, I wish I had zoomed in, but I just had enough card stock (and wasn't making yet ANOTHER trip to the store).
Note: I had initially hoped to paint the back of the frame yellow, but since it was a long frame, I wanted to use the back of the insert (you know the one with the fake pictures on it). There was still too much white on the frame, so Alex said cut a heart out behind it...so we did!
3. Yellow Hearts - I cut a plethora of yellow hearts (okay maybe not a plethora, but as many as I could squeeze out of the 8x11 sheet of card stock I had left). I thought about doing a patterned design, but this is the one that looked the best. I just rolled a piece of masking tape to hold them in place. It gave the hearts a little bit of dimension...or as much as you can in a frame.

4. Pins - I was worried that the pins were going to be too thick. I used all red sewing pins and put a pin where the actual location was. Because the pins obviously stuck through the back of the board, I just folded them over and taped the back. 
5.  Labels - Alex has really ridiculously nice handwriting. It's actually the only reason I married him (kidding). So I made him write the we met. we married. we lived. we traveled. we loved. This was his "fun" handwriting.

Ultimately, I thought they turned out great. My in-laws were touched. It was a quick project. I am looking forward to having enough history with Alex to make one of my own. All though we could
 do just a UGA one....we met. we cheered. we lived. we loved. we lost?...

Friday, May 25, 2012

Organizing Under the Sink

As I was going through all the pictures of when we first bought the house, I realized wow our bathroom sink looked so nice! Two people sharing the one bathroom made it a wee bit clogged. We have such a pretty marble counter top sink..why hide it with crappy white trays to hold all of our stuff!?

I was sick of it and ended up throwing out a lot of crap we didn't need. RIP my caboodles case I had for probably 15 years...you had "left over" make-up/nail polish/extra bobby pins and weren't really of any use. Mine wasn't "sleek" like this one. It was that clunky green one, but boy was that hard to toss.

Wally World has these black cloth bins in the laundry/storage section for $5/each (although I'm pretty sure they rang up for $7 or $8...but the line to wait for a refund was really long for maybe a total of $5, and I had to pee sooo you won this round Wally World). Although compared to the online price, I think I got a deal regardless. Everything isn't neat and aligned, because I was trying to play keep away with that black object in the picture, also known as Lucy. However, it works great! The right bin has my hairdryer, curling iron, straightener & brushes. The middle section has Alex's stuff & my contacts. The far left bin has all of the bottled stuff - deodorant, hairspray, astringent, face cream, etc. The bottom shelf has extras in the last black bin - cotton balls, whitening strips, extra q-tips. The far end has my make-up and hair ties.

So what do you ask is in the center?...wait for it...a silverware drawer dish. - In the words of my brother it was the exact same thing, only different - black, plastic and it was $5. So this baby holds my jewelry (I've tried cases, but I'm wayyyy tooo lazy). With this I can keep my necklaces by type (sorta) in the lines and my earrings (which I tend to haphazardly throw into a dish anyway) in the main dish. It's been great! We've kept the sink clean too!

The only issue I'm having is that the q-tips & hair ties are within Lucy's reach...which means she grabs them and runs out, because she's a PITA like that :)I think the bins work, because they are general enough that I can put things back without feeling as though I'm spending all of my time putting things back. I really couldn't be happier. It's been almost two week, and I'm still using them! Plus it was easy to grab everything as we live out of the hoarder's room while we're redoing the floor.

Thursday, May 24, 2012

Updated: Coffee Table

The ever changing coffee table!

Alex decided to redo the coffee table, because the first one had iffy varnish covering. He also decided to try a different pattern. I don't have a tutorial on this one, because I didn't do it. I did help pick the colors though! We had left over yellow & green. I told Alex that I didn't want yellow, green, & red. I knew he was going to go straight lines (he's a symmetrical balance sort of person). I thought our coffee table would end up looking like a flag. We didn't want that.

So what he sanded the table. Then he painted the entire table red. It's a Tuscan Rose, which is too pink for the furniture...so we have extra pink paint. Maybe I'll redo the bathroom...Anyway, he did two coats and let it dry. Then he put down painters tape leaving a little edge (because that was easier to paint). After the painters tape went the black paint. After that dried he put down 4 or 5 layers of polyurethane.

I think it looks nice. I wanted to do green wines on top of the red with yellow flowers. Alex said he was a man and would not have that in his living room (not really but he did tell me we were too young to have that design...so I'm going to be sneaky and figure out another way to get what I want!).

Anyway, the varnish cover was much cleaner this time and I think it turned out fantastic. I'm proud of his efforts on this!
In retrospect from the beginning just red...I think this turned out much nicer and much more fluid!


Wednesday, May 23, 2012

Tips to Simplify

Just have to say some of these things are brilliant! Will be trying as I continually try to organize our lives!

Other organizational ideas are found here too!

Tuesday, May 22, 2012

Penny Years

For whatever reason I got this idea in my head to do something with pennies for my little brother's birthday. I think you can come up with plenty to do with pennies. This was my idea!

Where I got the idea: Myself

Time: A few days to find the pennies, but the actual project took 45 minutes

Shopping List:
Penny from every year
Krazy Glue
Flat Frame
Colored Paper
Black Fine Point Sharpie

Instructions:
1. Prep: Finding a penny for every year was pretty easy. Then again he was born in 1989. I actually think if you had a few weeks you could do this for numerous ages. I thought about doing one for special occasions - years our parents born, year he was born, year people met, year graduated college...I think you can end up doing a lot of creative things with it.  

2. Glue: Arrange the pennies in chronological order around the frame. This is important, because Krazy Glue dries those suckers on there fast & tight. I messed up the corner of the frame. I didn't have enough pennies to cover the entire frame (I used 5x7). Fortunately, I spaced them out and said there was room for two more for his 24th & 25th birthdays! :) Go Me!

3. Frame: I thought it was clever to use the phrase: "Find a penny, pick it up, all day long you'll have good luck!" I changed the day to year (since I used a penny for each year...). I thought printing it would be a little too impersonal, so I tried freehand calligraphy  my best pretty cursive (which isn't THAT great...). I practiced about 4 times before getting my spacing just right..and it still looks just "eh".

All in all, I think he really liked it. He thought it was nice, and then realized it was a penny from each year he's been alive. I got him two other things as well, but I thought this was nice & sentimental and didn't cost really anything to do!

Painted Hand Rail

After Alex painted the stair rails, we decided to paint the hand rail as well. I had a while to wait for the exterminator yesterday (routine checkup, no need to worry!). I decided to paint the hand rail! 
 
Where I got the idea: Myself?

Time Project Took:
90 Minutes

Shopping List:

Black Acrylic Paint
Cheap Foam Brush
Plastic Cup (to put the paint in)
Construction Paper & Painters Tape
 
Instructions:
1. PrepI had extra construction paper, so I used that as my wall painters cloth. I thought I'd be able to slide the paper behind the bottom of the rails...I didn't have quite as much luck with that as I originally thought. But this worked quite well, and there was only a little bit of paint on the wall. 
Speaking of paint, I used acrylic, because that's what I had. The rail turned out fine, even though I maybe should have used wood. The paint is like $3 at Wal-mart. I used a plastic cup to put the paint in. With three coats, I used 1/2 a bottle. 

 This worked out just fine. The foam brush I used was a cheap back that came in a set of like 4 for $1. As I said, it worked just fine for all of this.

2. First Coating: I was worried with the first coat, because I didn't want to use too much paint, but it was a really thin layer. I painted underneath the rail and a little bit over the fixtures. The person before me had done the same, so I wasn't too overly concerned. This took no time at all to dry. Because I spent so much time getting every edge, I immediately went to paint coat two, which I applied a little more liberally.


3. Second & Third Coating: The next two coats went my much quicker (as I didn't spend a lot of time underneath the railing...its mostly black no one looks underneath your rail, so why spend a lot of time making sure it's super black!). I liked using acrylic, because when you do have spots like in the picture, a wet paper towel will clean that right up!


I let the second coat dry for for 10-15 minutes. The dog's tails had a little bit of black on them...they can't keep out of anything.

All in all it dried with a really nice finish. The third coat was mostly touch ups. All in all I'm really happy with it, and it makes the stairs pop next with Alex's other painting. We're going to do the basement rails too, but Tuscan Red to match the accents.