Showing posts with label 90 minutes. Show all posts

Friday, July 20, 2012

Woven Wine/Beer Journal

It's been a while. I've been a slacker. I did want to share a project I did (which I think will soon be replaced by an awesome App I found unfortunately). So let me say this...1) If you want to cover a regular sized composition notebook, you need to use prints larger than 8x10. The smaller composition book I used was really not adequate. This is by far not the best work I've ever done, but it's cute.

Where I got the Idea: Ruby Murrays Musings

Time: 2 hours

Shopping List:
Small Composition Notebook
Double-sided Tape
Clear Scotch Tape
5 or 6 pages from a Beer & Wine magazine
Something heavy to hold down the magazines with
Scissors
Instructions:
1. Prep - To begin, you'll need to cut the pages of the magazine into strips. If you were smart (unlike me), you'd actually measure. I was doing this to reduce stress, so I just cut. As you can see, my lines are not uh even.


2. Tape - You'll need to cover the front of the composition book with double-sided tape.     


3. Weave - Layout all of the horizontal pieces, I used two(ish) magazine pages. One of a bottle of wine and one of a bottle of Whiskey. I inter-spliced this (one part of the wine bottle, then a strip from the whiskey bottle, then part of the wine bottle, etc.), because I thought it would look kinda cool. In retrospect, I think I suggest doing one then the other.


4. Weave - So then you take one of the remaining strips and weave it through the horizontal row. It's helpful to put something heavy on the corner to weight down while you are weaving. 


5. Assembly - I put my woven picture on top of the book and flattened starting at the binding. I then cut the edges to match the edge of the composition book.
 6. Tape - I think the original person used contact paper, which I'm sure looks nicer. I just had scotch tape, so I taped the cover down for protection.
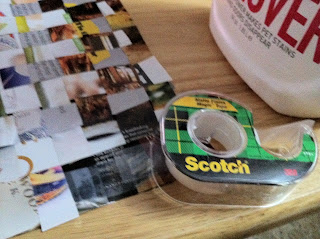
7. Wine/Beer - So I used one side of the book for wine and one for beer. The wine has been just Robert Mondavi, which hasn't been bad! The beer we've had all kinds of varieties of Clown Shoes, Terrapin, more Terrapin, Lagunitis, and more. 

While I like my journal, we then found an awesome app for the ipad called My Beer Nation. It's pretty awesome....we've been using that. I plan on trying to make the woven atlas journal for my grandparents for their travel to Egypt. I think it'd look pretty cool! :)

Tuesday, May 29, 2012

Map Heart Frame

I saw this idea and thought it was the cutest thing. My in-laws anniversary is on the 30th and they were hauling off our carpet for us, so I thought this would be cute for them!
Where I got the Idea: Queen B - Creative Me
Time:
90 minutes
Supplies:
6 sheets of card stock (5 are off white and 1 is yellow for the accent)
Sewing pins
Heart stencil
Pencil
Scissors
Masking Tape
Long Frame
Pen & someone with nice hand writing
Instructions:
This was a Friday afternoon decision to do this project, so on my way home from work I went to Marshall's to find a frame. This one was $13, had I spent some time looking for other frames I probably could have found one for less. 

1. Prep: I found the address to the 5 places that were meaningful to my in-laws: where they met, where they were married, where they lived for 15 years, where they loved traveling, and the house they love now. I found the address on mapquest and printed them on the card stock. I tried to be clever, save paper, and use one side for each...with mapquest's headers & footers that didn't actually work.
2. Cut Stencils: I went to look for a heart punch at Joanns. First, they were all smaller than I wanted. Second...wow! $18!??! Seriously!? So I grabbed a stencil set that was $5 (still hated spending $5 for it). I traced the stencil with a pen (because I'm lazy and there wasn't a pencil in my immediate vicinity).  I did this for all of the locations. You MAY want to get an extra few sheets of card stock. One of the locations was zoomed out a little bit too far, I wish I had zoomed in, but I just had enough card stock (and wasn't making yet ANOTHER trip to the store).
Note: I had initially hoped to paint the back of the frame yellow, but since it was a long frame, I wanted to use the back of the insert (you know the one with the fake pictures on it). There was still too much white on the frame, so Alex said cut a heart out behind it...so we did!
3. Yellow Hearts - I cut a plethora of yellow hearts (okay maybe not a plethora, but as many as I could squeeze out of the 8x11 sheet of card stock I had left). I thought about doing a patterned design, but this is the one that looked the best. I just rolled a piece of masking tape to hold them in place. It gave the hearts a little bit of dimension...or as much as you can in a frame.

4. Pins - I was worried that the pins were going to be too thick. I used all red sewing pins and put a pin where the actual location was. Because the pins obviously stuck through the back of the board, I just folded them over and taped the back. 
5.  Labels - Alex has really ridiculously nice handwriting. It's actually the only reason I married him (kidding). So I made him write the we met. we married. we lived. we traveled. we loved. This was his "fun" handwriting.

Ultimately, I thought they turned out great. My in-laws were touched. It was a quick project. I am looking forward to having enough history with Alex to make one of my own. All though we could
 do just a UGA one....we met. we cheered. we lived. we loved. we lost?...

Tuesday, May 22, 2012

Penny Years

For whatever reason I got this idea in my head to do something with pennies for my little brother's birthday. I think you can come up with plenty to do with pennies. This was my idea!

Where I got the idea: Myself

Time: A few days to find the pennies, but the actual project took 45 minutes

Shopping List:
Penny from every year
Krazy Glue
Flat Frame
Colored Paper
Black Fine Point Sharpie

Instructions:
1. Prep: Finding a penny for every year was pretty easy. Then again he was born in 1989. I actually think if you had a few weeks you could do this for numerous ages. I thought about doing one for special occasions - years our parents born, year he was born, year people met, year graduated college...I think you can end up doing a lot of creative things with it.  

2. Glue: Arrange the pennies in chronological order around the frame. This is important, because Krazy Glue dries those suckers on there fast & tight. I messed up the corner of the frame. I didn't have enough pennies to cover the entire frame (I used 5x7). Fortunately, I spaced them out and said there was room for two more for his 24th & 25th birthdays! :) Go Me!

3. Frame: I thought it was clever to use the phrase: "Find a penny, pick it up, all day long you'll have good luck!" I changed the day to year (since I used a penny for each year...). I thought printing it would be a little too impersonal, so I tried freehand calligraphy  my best pretty cursive (which isn't THAT great...). I practiced about 4 times before getting my spacing just right..and it still looks just "eh".

All in all, I think he really liked it. He thought it was nice, and then realized it was a penny from each year he's been alive. I got him two other things as well, but I thought this was nice & sentimental and didn't cost really anything to do!

Painted Hand Rail

After Alex painted the stair rails, we decided to paint the hand rail as well. I had a while to wait for the exterminator yesterday (routine checkup, no need to worry!). I decided to paint the hand rail! 
 
Where I got the idea: Myself?

Time Project Took:
90 Minutes

Shopping List:

Black Acrylic Paint
Cheap Foam Brush
Plastic Cup (to put the paint in)
Construction Paper & Painters Tape
 
Instructions:
1. PrepI had extra construction paper, so I used that as my wall painters cloth. I thought I'd be able to slide the paper behind the bottom of the rails...I didn't have quite as much luck with that as I originally thought. But this worked quite well, and there was only a little bit of paint on the wall. 
Speaking of paint, I used acrylic, because that's what I had. The rail turned out fine, even though I maybe should have used wood. The paint is like $3 at Wal-mart. I used a plastic cup to put the paint in. With three coats, I used 1/2 a bottle. 

 This worked out just fine. The foam brush I used was a cheap back that came in a set of like 4 for $1. As I said, it worked just fine for all of this.

2. First Coating: I was worried with the first coat, because I didn't want to use too much paint, but it was a really thin layer. I painted underneath the rail and a little bit over the fixtures. The person before me had done the same, so I wasn't too overly concerned. This took no time at all to dry. Because I spent so much time getting every edge, I immediately went to paint coat two, which I applied a little more liberally.


3. Second & Third Coating: The next two coats went my much quicker (as I didn't spend a lot of time underneath the railing...its mostly black no one looks underneath your rail, so why spend a lot of time making sure it's super black!). I liked using acrylic, because when you do have spots like in the picture, a wet paper towel will clean that right up!


I let the second coat dry for for 10-15 minutes. The dog's tails had a little bit of black on them...they can't keep out of anything.

All in all it dried with a really nice finish. The third coat was mostly touch ups. All in all I'm really happy with it, and it makes the stairs pop next with Alex's other painting. We're going to do the basement rails too, but Tuscan Red to match the accents. 

Monday, May 7, 2012

Painted Stair Rails

The next project was pretty easy. My mother had painted her stair rails black and the stairs popped. She has nice exposed stairs so you can see the railings all the way up. We just have a little. So Sunday morning, we taped & painted the railings black! This was a quick project with a big impact. The railings had been painted before, so we just painted over the white.
Who I got the idea from: My Mother

Time: 90 minutes

Shopping List:
Black Acrylic Paint - $3 (We had some left over from the Organizational Board)
Painters Tape - $3 (We had some around)
Paint Brush - $12
Foam Paint Brush Touch Ups - $1
 
Instructions:

1. Prep: First, tape off the stairs. The sections by the base were easy, since those were straight lines. The upper part, I ended up tearing small pieces to put around the top. EVEN if you/your helper thinks they can paint around...make sure you tape extra. Alex used a large paint brush which got everywhere.

2. Paint: We did two coats over the rails & did touch ups with a small foam brush. Obviously, let the paint dry between coats. Keeping tweedle dee & tweedle dumb  Gus & Lucy from licking the stairs was a bit of a challenge. 

3. Touch Up: Remove the painters tape & if need be touch up any areas where you may have dripped black paint. We had a few...
We're going to paint the railing up the stairs black too, but for right now, I think they turned out really nice!
Here's what they looked like before:

UPDATED: See the update here!


Monday, April 23, 2012

Red & Black Fence Pots

I did these at the same time as the 3-Tiered Pots, because well I had the spray paint. We have an ugly privacy fence, that probably needs to be pressure washed/stained & replaced. So when I saw this, I thought oh! This will help cover up the dullness of the wood fence! As such, I opted to only do 6 rather than 9 pots. I figured I can always go back and swap them out.

Who I got the idea from: Shelterness

Time: 90 minutes

Shopping List:
6 Medium Sized Terracotta Pots
6 Flowers (I got two different kinds of annuals - two of each kind, because I like symmetry)
3 cans of spray paint (I went for Cherry Red, Black & White)
1 can Thompson Water Seal Spray
Painters Tape
Potting Soil
Cordless Drill

Instructions:

1. Cover where-ever your painting with painters cloth (your husband will be upset with you if you don't cover everything...scrubbing afterwords takes forever...)

2.  Spray your pots & dish with the Thompson Water Seal Spray. You may want to read the instructions and not spray before it rains & let it seal....or you can be lazy like me and just go for it.

3. Spray Paint the edges of the pots white and let dry. It's okay if you go over the edges a bit.  It shouldn't take more than 10 minutes to dry, especially if you do this on a nice sunny day.

4.  Put painters tape around the white where you just painted. Be sure to just go on the edge. If you don't wait to let it dry...you'll have to redo.

5. Paint the large & small pots with red spray paint, and paint the middle pot & bottom 
saucer with black spray paint.  Let them dry.

6. Take off the painter's tape. 

7. Plant your flowers. So my flowers were too big for my pots, so I didn't need any extra soil. I actually needed less soil.

I had to stop here, because I didn't plan ahead, and order the pot latch things. The only place I could find that had them was Vat19.com

8. Screw the Pot Latches onto the wood fence (they should come with screws).

9. Latch your pots into place! Voila!

Three-Tiered Pots

This wasn't difficult either. The hardest part was scrubbing the spray paint off the table from where I may or may not have fully covered prior to spray painting...

 
Who I got the idea from: Positively Splendid Crafts

Time: 90 minutes

Shopping List:
3 different sized Terracotta pots
1 Terracotta bottom dish
3 cans of spray paint (I went for Cherry Red, Black & White)
1 can Thompson Water Seal Spray
Painters Tape
Potting Soil
Flowers

Instructions:
1. Cover where-ever your painting with painters cloth (your husband will be upset with you if you don't cover everything...scrubbing afterwords takes forever...)

2.  Spray your pots & dish with the Thompson Water Seal Spray. You may want to read the instructions and not spray before it rains & let it seal....or you can be lazy like me and just go for it.

3. Spray Paint the edges of the pots white and let dry. It's okay if you go over the edges a bit.  It shouldn't take more than 10 minutes to dry, especially if you do this on a nice sunny day.

4.  Put painters tape around the white where you just painted. Be sure to just go on the edge. If you don't wait to let it dry...you'll have to redo.

5. Paint the large & small pots with red spray paint, and paint the middle pot & bottom saucer with black spray paint.  Let them dry.

6. Take off the painter's tape. 

7. Put in 3/4 of the bottom pot. The original post said to put bricks & soda cans in there. I forgot to look for bricks and felt putting beer cans in there would be slightly trashy, so I just opted for soil. If you opt for just soil, be sure to pack it in so that it stays.  

8. I put the middle pot in at this time, and put my viney plants into the side. I may have shoved them in there, which I'm sure will make anyone that actually knows anything about gardening shutter. So you could put them around the edges, then put the pot in. Mine were a tight fit.  

9. Do the same with the middle pot. 

10. Put your plants in the top  pot. 

I had to play around with the layout a bit, because you originally couldn't see the black middle pot. My saucer is a little bit too big, but I can't fix that now. The other mistake I made was painting the red & black first, then painting the rims white. I ended up having to tape the entire painted pots so they wouldn't have white on them. In retrospect, I'm not sure what I was thinking...

UGA Ribbon Wreath

This was actually really easy to make and looks really good!  I can't wait to make more of these for different seasons (although is there really another season other than football?)
 
  
Who I got the idea from: Rollin' with the Wheeler's

Time: 90 minutes (max)

Shopping List:
1 stirofoam wreath (you can use the green one or a white one, the white worked for me)
6 rolls of different color ribbon (I used 5 here and could have used one more)
A packet of pins
Scissors

Instructions: 

1. Cut all of the ribbon into 4 inch pieces. I originally did longer like the blog did, but found I liked the smaller loops. (I looped the ribbon into segments and then cut, since that was quicker)

2. Start with one color and pin several loops around the wreath.

3. Take a second color ribbon and follow suit. My husband gave me really weird looks until it was more full. 

4. Keep pinning until you use up all of the ribbon. I left the backside mostly plain, because it's going against the back of the door.